
Woo Checkbox Webhook integrates seamlessly with FluentCRM (Free & Pro versions), allowing you to automatically add customers to your email list or automation funnels when they opt-in at checkout.
This integration uses FluentCRM’s built-in “Collect email at checkout” trigger, and requires no extra configuration inside the plugin—just set up your funnel in FluentCRM, and it works out of the box.
The only condition: the customer must check the opt-in checkbox during checkout for the trigger to fire.
How to Set Up FluentCRM Automation Funnel
Follow these steps to start collecting subscribers via WooCommerce checkout:
1. Log in to Your WordPress Dashboard
- Make sure both FluentCRM and Woo Checkbox Webhook are installed and activated.
- Your WooCommerce store should already be configured.
Create a New Automation Funnel in FluentCRM
- Go to FluentCRM → Automations
- Click “Create New Automation”
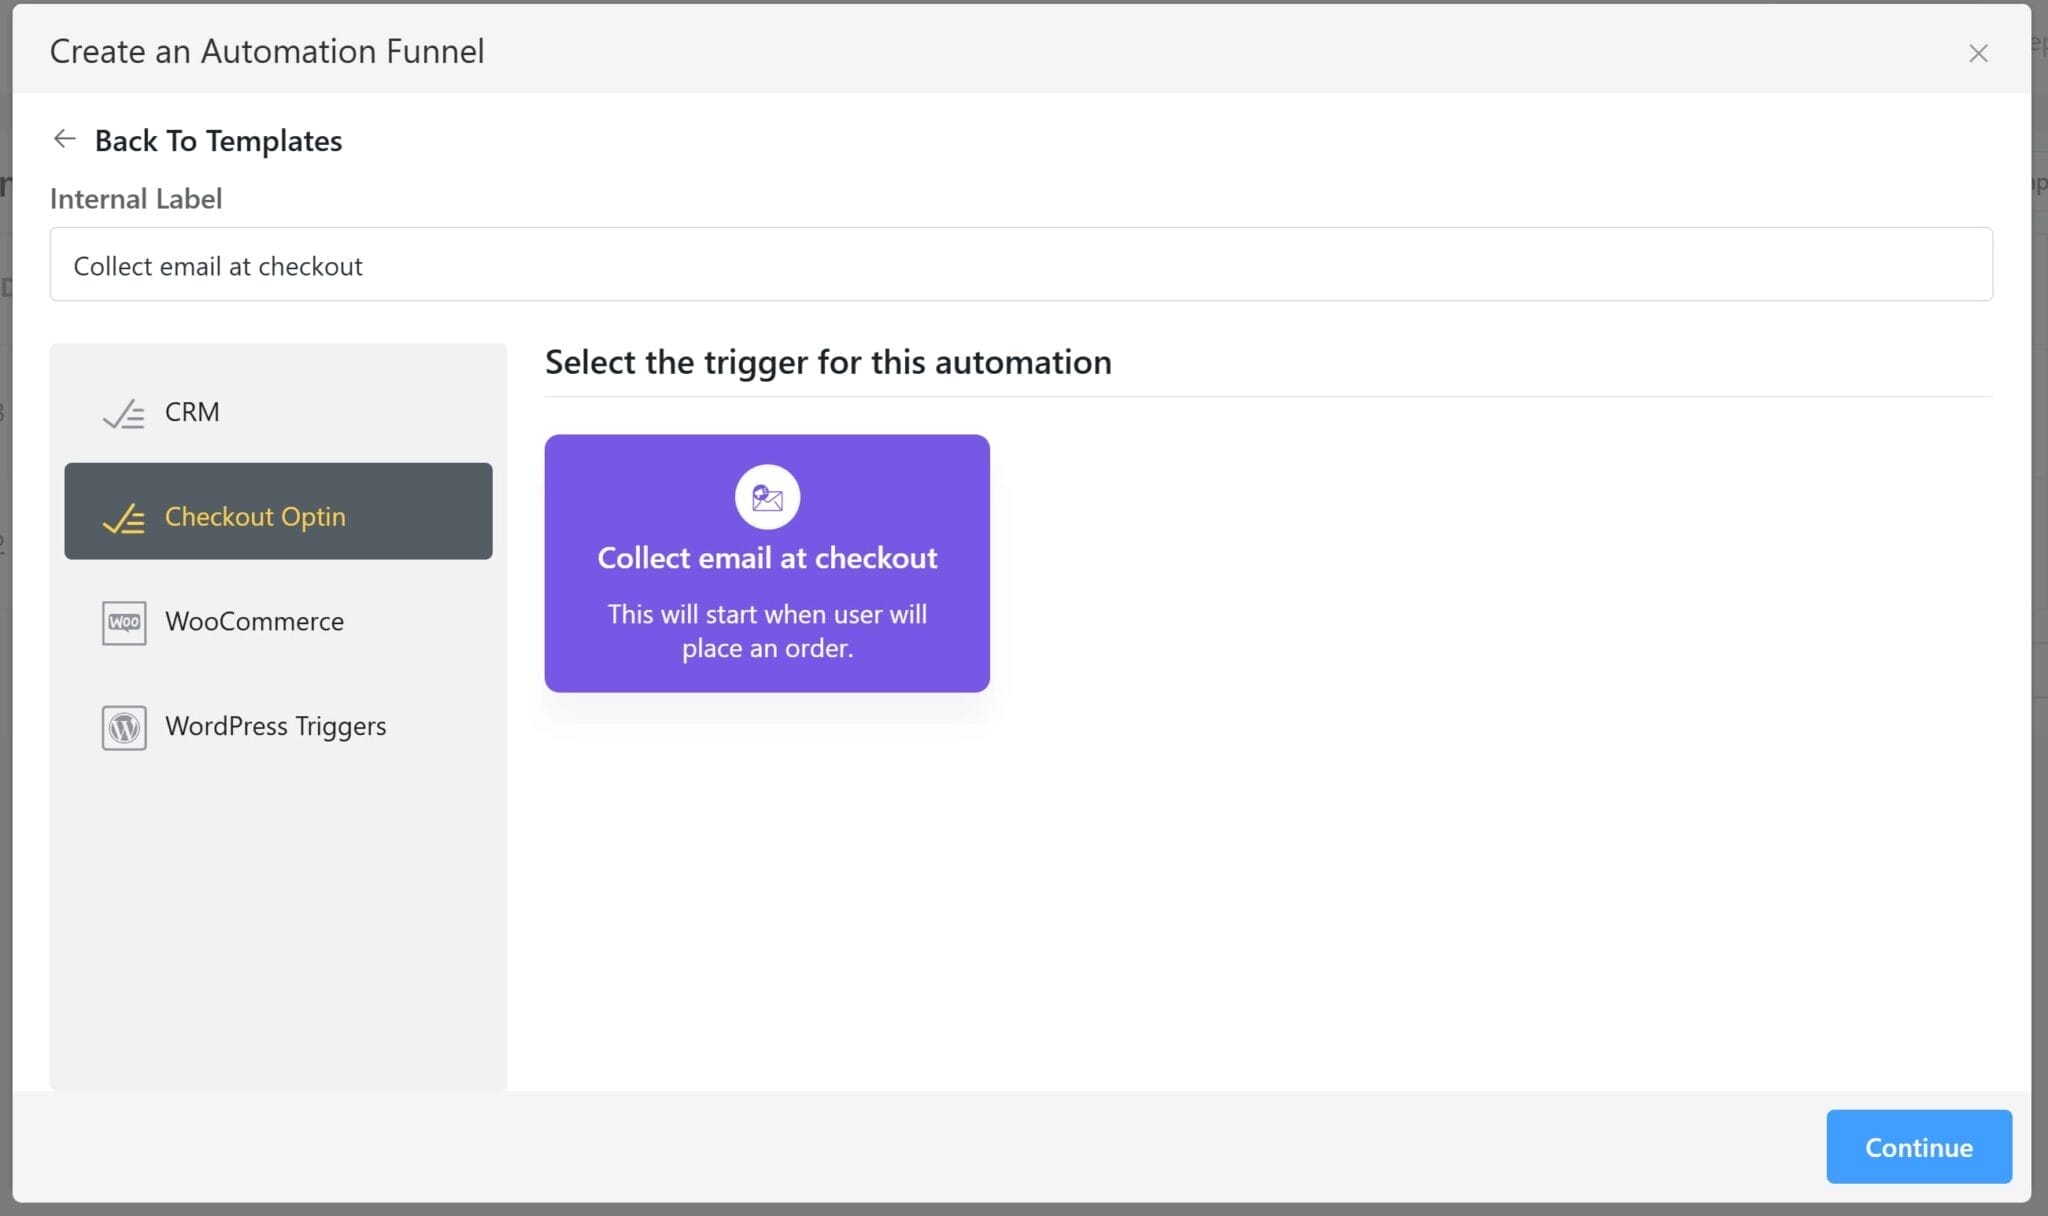
- Select the “Collect email at checkout” trigger
- Give your automation a name (e.g.
Checkout Opt-in Funnel) - Click “Continue”
- Once the new New WooCommerce Order has been placed trigger has been place, click “Save“
This trigger only fires when the customer checks the opt-in box at checkout. If the box is unchecked, no data will be sent to FluentCRM.
4. Define Your Automation Steps (Optional)
Once the trigger is added, build out your funnel. Some common steps include:
- Add Contact to a List
- Apply a Tag
- Send a Welcome Email
- Start a Drip Sequence
You can mix and match steps to fit your email marketing strategy.
5. Activate the Funnel
- Once you’re happy with your funnel setup, click the Activate Funnel toggle.
- Now, whenever a customer opts in at checkout, they’ll be automatically added to this automation in FluentCRM
How It Works Behind the Scenes
- The opt-in checkbox is rendered by Woo Checkbox Webhook during checkout.
- If the box is checked, the plugin passes the customer’s email and details to FluentCRM.
- FluentCRM detects this using its Collect Email at Checkout trigger and starts the funnel.
- No webhook, API key, or additional plugin settings are required.
Troubleshooting
- Funnel not triggering? Double-check that the checkbox was selected during your test order.
- Still not working? Make sure:
- FluentCRM is up to date
- The automation funnel is active
- The WooCommerce checkout is using the standard flow (shortcode or block) that supports Woo Checkout Webhook

